


Thanksgiving Appetizers


Normally, we don’t have a large selection of appetizers before our Thanksgiving meal. We do always have peel ‘n eat shrimp because everyone is my family loves them—they satisfy a growling stomach and don’t have a lot of calories. This year is different. My two daughters will be coming at 9 o’clock to help me get the turkey on and staying for the rest of the meal’s preparation. I am excited to teach them my Thanksgiving tricks.
Since they will be here for most of the day, we will have a huge appetizer selection. I have included my recipe for our favorite—Peel ‘n Eat Shrimp aka Shrimp Cocktail and my homemade cocktail sauce along with Cranberry Brie Tarts and my newest favorite—Pumpkin-Shaped Cheese Balls. I like serving my cheese ball with assorted meats, cheeses, crackers, olives, nuts, and fruit.
Carol Ann’s Pumpkin-Shaped Cheese Balls

Following is my favorite cheese ball recipe. If you are on social media, pumpkin-shaped cheese balls are everywhere. What a fun, festive addition to Thanksgiving Day appetizers. If you are pinched for time and don’t want to make a cheese ball, try using a 5.3 ounce package of Boursin cheese. I was rushed and made cheese balls with Boursin cheese for my PEO group, and they loved them. Follow the same directions. Roll the Boursin cheese into a ball, cover it with shredded Cheddar cheese, wrap it with plastic wrap, then use cooking twine to make the indentions.
Carol Ann’s Pumpkin-Shaped Cheese Balls
Makes 1 large or 2 small cheese balls
2 packages (8-ounces) cream cheese, softened
1 ½ wedges (8-ounces) sharp Cheddar cheese, shredded and divided
1 tablespoon pimiento, chopped
1 tablespoon green bell pepper, cored, seeded, and diced
1 tablespoon green onions, thinly sliced
2 teaspoons Worcestershire® sauce
1 teaspoon fresh lemon juice
Dash cayenne pepper, or to taste
In a medium bowl, combine cream cheese and 8-ounces shredded Cheddar cheeses and blend thoroughly. Add pimiento, green bell pepper, green onions, Worcestershire® sauce, and lemon juice. Season to taste with cayenne pepper. Mix thoroughly.
Using your hands, roll the cheese mixture into 1 or 2 balls, depending upon how large you want your pumpkins. Place the remaining shredded Cheddar cheese on a plate. Roll each ball in the shredded cheese, coating as evenly as possible.
Lay a sheet of plastic wrap on the counter for each ball. Place cheese ball in the center and pull the edges up to form a round, slightly flattened ball. Tie a 3 to 4-foot piece of clean cooking twine around the wrapped cheese ball 4 times (crossing over the top and bottom like a segmented orange) to create the signature pumpkin indentations.
Refrigerate for at least 2 hours but can be made a day ahead and refrigerated overnight.
Unwrap plastic from ball. Use a stem from a bell pepper, tomato or a winter squash for the top stem. The small ribs with leaves at the top of a celery stalk also work nicely. Serve with crackers and your favorite charcuterie.
Shrimp Cocktail with Homemade Cocktail Sauce

Shrimp Cocktail with Homemade Cocktail Sauce
Serves 4 to 6
Shrimp cocktail is another easy appetizer to prepare and always a crowd pleaser. For a more festive presentation, fill martini glasses with cocktail sauce, place shrimp around the rim of the glass, and garnish with a sprig of parsley and a wedge of lemon. If you want to serve shrimp cocktail, don’t buy pre-cooked shrimp. They will be rubbery. Use raw shrimp. Shrimp cooked with their shells on have a more intense flavor. You will want to remove the shells, leaving the tails on, and de-vein the shrimp before serving. Tips on de-veining shrimp follow the recipe. You want everything to be perfect around the holidays, so make your own cocktail sauce. Homemade is better than store bought any day. We usually make two pounds. The following recipe is only one pound of shrimp. No need to double the ingredients used for boiling.
For the shrimp cocktail sauce:
½ cup ketchup
½ cup Heinz Chili Sauce
4 tablespoons prepared horseradish, or to taste
½ tablespoon fresh lemon juice, or to taste
½ teaspoon Worcestershire® sauce, or to taste
¼ teaspoon hot sauce, or to taste
In a medium bowl, combine ketchup, chili sauce, horseradish, lemon juice, Worcestershire sauce, and hot sauce. Refrigerate until ready to serve.
For the shrimp:
3 tablespoons Old Bay Seasoning®
1 lemon, halved
2 teaspoons minced garlic
24 extra-large shrimp, tails and shells on
Fill a large bowl with ice water and set it in or near the sink. Fill an 8-quart kettle with water. Add Old Bay Seasoning, lemon, and garlic and bring water to a boil. Add shrimp to the kettle. When the water returns to a boil, the shrimp should be done. They should be bright pink in color, and their tails should curl.
Drain shrimp and place them in the ice bath for 2 minutes. Peel and de-vein the shrimp, leaving tails on.
Tips on de-veining shrimp: Unless you are cooking with very small shrimp, they must be de-veined. The intestinal tract on medium to large shrimp runs down their back and is quite unappetizing. To de-vein shrimp, hold them under a slow stream of cold water and run the tip of an ice pick, sharp knife, or toothpick down their back, scraping out the intestine, yet leaving the shrimp intact. Rinse gently to remove any black from the shrimp.
Tips on shopping for shrimp: Shrimp are sold according to the number in a pound known as the count. Jumbo shrimp range 21-25 per pound, extra-large—26-30, large—31-35, medium—36-42, small—51-60, extra small—61 and over. When making peel-and-eat shrimp or shrimp cocktail, larger shrimp are preferable. For shrimp salads or other dishes, a smaller shrimp is better. When shrimp is on sale, be sure to check the count your grocer advertises.
Fresh versus Frozen. Fishermen put shrimp on ice as soon as they are caught. This preserves the shrimp, freezing them so they are just-caught fresh until they are thawed. The fresh shrimp you see on ice in the seafood counter at your supermarket were most likely once frozen and are thawing in the counter. The longer they are in the counter, the less fresh they will be. Unless you know that the fresh shrimp you are buying is fresh off the boat, frozen shrimp is a better choice.
Wild-Caught or Farm-Raised: Wild-caught shrimp have a sharper, more shrimpy taste; however, they are pricier and harder to find. Ninety percent of shrimp sold in the United States are imported from Southeast Asia, Ecuador, and India; and the majority of that is farm-raised. Your supermarket is required to divulge the country of origin and whether shrimp is wild or farmed. Check the label.
If you have doubts, farm-raised shrimp cultivated under cleaner standards will bear a “Best Aquaculture Practices” label. The certification label to look for when buying wild shrimp is “Marine Stewardship Council Approved”.
Cranberry Brie Tarts

This is an extremely easy appetizer to prepare and is absolutely to die for. I use homemade cranberry sauce when I make this. You can substitute raspberry or strawberry preserves or use fig jam. If you don’t want to use rosemary leaves as a garnish, a sprinkling of chopped nuts also works nicely. One package of frozen phyllo tart cups contains 15 pieces. These tarts are so delicious you may want to make two batches.
Cranberry Brie Tarts
Makes 15 pieces
1 package frozen phyllo tart cups, 15 pieces
1 (8-ounces) wheel Brie cheese
½ cup cranberry sauce.
Rosemary for garnish
Preheat the oven to 350 degrees F. Line a baking sheet with parchment paper. For an easier removal of the rind of Brie, place it in the freezer for 15 to 20 minutes before removal.
Using a cheese slicer or a serrated knife, remove rind from Brie. Tiny bits of rind left on the Brie will melt so don’t be afraid to leave a bit on. Brie is so delicious we don’t want to waste it. Cut Brie into 1-inch pieces.
Take phyllo cups directly from the freezer and place on the baking sheet. Place 1 piece of Brie into each phyllo cup. Top with ½ teaspoon cranberry sauce.
Bake for 6 to 8 minutes, or until Brie is melted.
Garnish with rosemary leaves
Tips on selecting Brie: Brie has its best flavor when perfectly ripe. Select one that is plump and resilient to the touch. Its rind may show some pale brown edges. Ripened Brie has a short shelf life and should be eaten within a few days.
Tips on storing soft cheese: Soft cheeses, like Brie, have the shortest shelf life of all the cheeses. To extend the life of soft cheeses, wrap them with parchment or wax paper and then a layer of aluminum foil or place them in a jar or Tupperware® container. When handled in this manner and placed in the cheese drawer of your refrigerator, soft cheese can last for up to 10 days. Soft cheeses with any sign of mold should be thrown out. They should last 1 week after the “Sell-By” date but only 3 to 4 days after opening.
Carol Ann

Carol Ann Kates is the award-winning author of cookbook, Secret Recipes from the Corner Market, and international Amazon best-selling and award-winning author of Grocery Shopping Secrets. She’s an expert in how to shop, select, and store produce for maximizing home cooking outcomes and minimizing time and money spent. As a former supermarket and deli operator, Carol Ann shares grocery-insider wisdom—the same expertise you used to receive when patronizing a mom-and-pop establishment. Contact her at CarolAnn@CarolAnnKates.com and explore her website, www.CarolAnnKates.com.
Copyright 2026 All Rights Reserved Carol Ann Kates
1
Searing the Beef
Sear beef fillets on high heat for 2 minutes per side to form a golden crust. Let it cool before proceeding to keep the beef tender.
1
Searing the Beef
Sear beef fillets on high heat for 2 minutes per side to form a golden crust. Let it cool before proceeding to keep the beef tender.
1
Searing the Beef
Sear beef fillets on high heat for 2 minutes per side to form a golden crust. Let it cool before proceeding to keep the beef tender.
1
Searing the Beef
Sear beef fillets on high heat for 2 minutes per side to form a golden crust. Let it cool before proceeding to keep the beef tender.
Notes


1
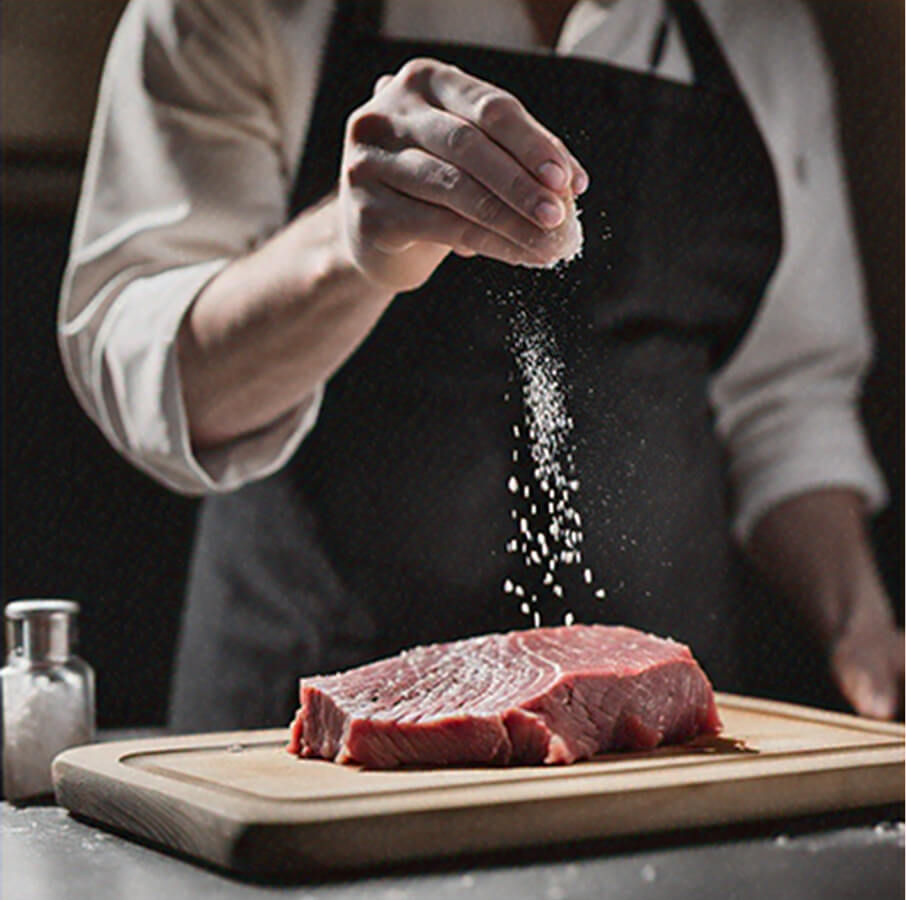
Season the good fresh beef fillets with salt and black pepper. Heat olive oil in a pan over high heat and sear the fillets for 2 minutes per side until it fully browned. Remove the beef from the pan and brush with a thin layer of mustard. Let it cool.
1
Season the good fresh beef fillets with salt and black pepper. Heat olive oil in a pan over high heat and sear the fillets for 2 minutes per side until it fully browned. Remove the beef from the pan and brush with a thin layer of mustard. Let it cool.
1
Season the good fresh beef fillets with salt and black pepper. Heat olive oil in a pan over high heat and sear the fillets for 2 minutes per side until it fully browned. Remove the beef from the pan and brush with a thin layer of mustard. Let it cool.
1
Season the good fresh beef fillets with salt and black pepper. Heat olive oil in a pan over high heat and sear the fillets for 2 minutes per side until it fully browned. Remove the beef from the pan and brush with a thin layer of mustard. Let it cool.
Instructions
Quality Fresh 2 beef fillets ( approximately 14 ounces each )
Quality Fresh 2 beef fillets ( approximately 14 ounces each )
Quality Fresh 2 beef fillets ( approximately 14 ounces each )
Beef Wellington
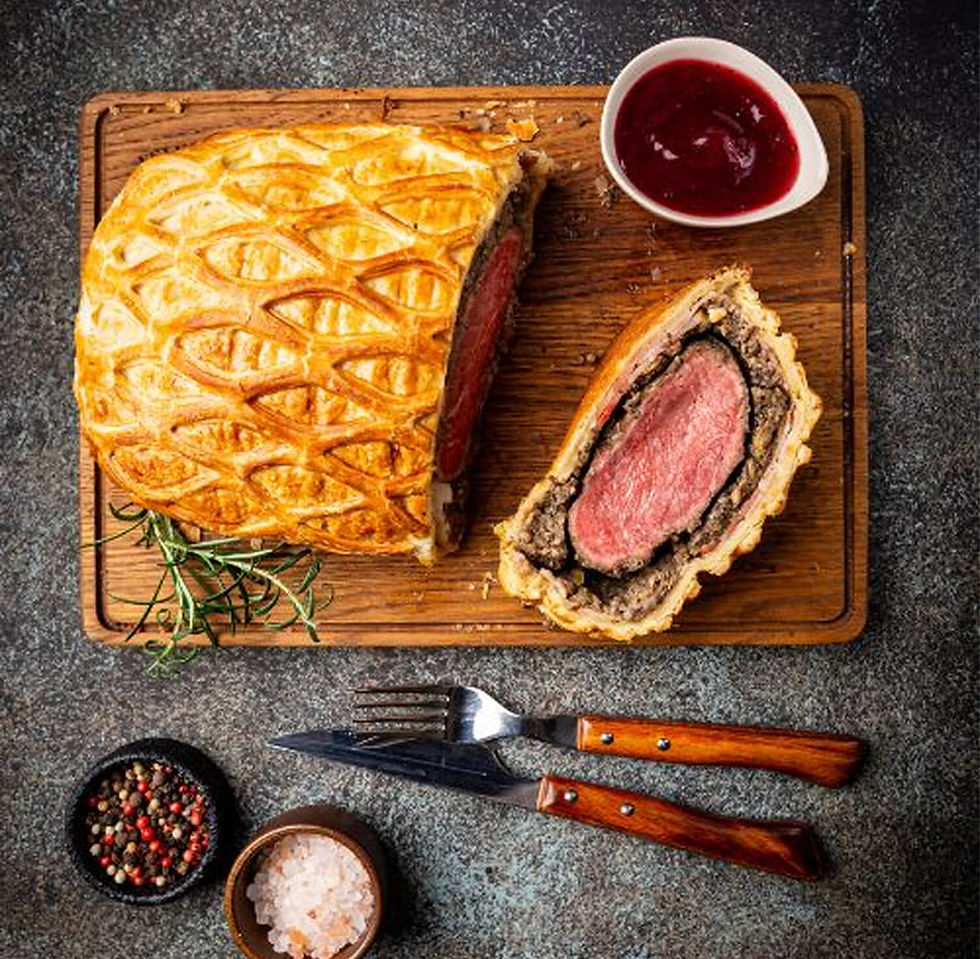
Beef Wellington
Fusion Wizard - Rooftop Eatery in Tokyo
Author Name

Beef Wellington is a luxurious dish featuring tender beef fillet coated with a flavorful mushroom duxelles and wrapped in a golden, flaky puff pastry. Perfect for special occasions, this recipe combines rich flavors and impressive presentation, making it the ultimate centerpiece for any celebration.
Servings :
4 Servings
Calories:
813 calories / Serve
Prep Time
30 mins
Prep Time
30 mins
Prep Time
30 mins
Prep Time
30 mins


Comments