
Pollo Scarpariello – Also Known as Shoemaker’s Chicken
- ckcallighan20209
- Oct 2, 2025
- 3 min read

Pollo scapariello, also known as Shoemaker’s chicken, is a rustic Italian-American dish made with seared chicken thighs, sausage, and peppers and braised in a sauce of wine, vinegar, and cherry pepper brine. It is believed to have originated in Naples, where the Neapolitan word scarparo means cobbler or shoemaker.
How did this dish get such a strange name? Some food historians believe it is because its ingredients are cobbled together into one pan, making it a simple yet flavorful meal to prepare. Others think the dish was so inexpensive to prepare that even a poor shoemaker could afford it. Another theory speculates that in parts of Naples, shoemakers were often paid with local products like cheese, vegetables, or wine. They combined their bartered food stuffs into quick, easy meals, creating the “shoemaker-style” of cooking. This style of cooking uses whatever is on hand to prepare a dish much like cobblers used whatever they had on hand to repair shoes.
Following is my version of Shoemaker’s Chicken, cooked in one kettle on the stove and transferred to an oven-proof baking dish to finish in the oven. I didn’t have cherry peppers on hand, so I followed the shoemaker-style and substituted pepperoncini. I love the shoemaker style of cooking, using what you have on hand. For more crispy skin, see my tips on buying air-chilled chicken for this recipe.
Pollo Scarpariello (also known as Shoemaker’s Chicken)
Makes 4 servings
Serve with crusty bread.
2 pounds bone-in, skin-on chicken thighs
Salt to taste
Freshly ground black pepper to taste
2 tablespoons extra virgin olive oil
4 links Italian sausage, about 1 pound
1 large red bell pepper, cored, seeded, and cut into thin strips
1 jalapeño pepper, halved, seeded, and minced
l large sweet onion, cut in half lengthwise and sliced
1 teaspoon minced garlic
8 pepperoncini, left whole
8 new potatoes, roasted (optional)
½ cup chicken broth
1 cup white wine
¼ cup juice from pepperoncini
1 tablespoon dried oregano leaves
½ teaspoon crushed red pepper flakes
Preheat the oven to 400 degrees F. Season chicken thighs to taste with salt and pepper. In a large kettle, place olive oil over a medium-high heat. When the oil sizzled, brown thighs, about 5 minutes per side.
Remove chicken thighs and set aside. Place sausage links in the kettle and sauté until browned, about 3 to 4 minutes. Remove sausage links and slice into 1-inch pieces.
Remove all but 2 tablespoons pan drippings. To the same kettle, add bell pepper strips, jalapeño, onion, and garlic and sauté until onion is translucent and begins to brown, about 5 minutes.
To the same kettle, add sausage pieces, pepperoncini, potatoes, chicken broth, wine, oregano, and crushed red pepper flakes and season to taste with salt and pepper. Stir to combine and transfer to an oven-proof baking dish. Place chicken thighs in the baking dish and bake until chicken breasts are cooked through, about 30 minutes.
Buy air-chilled chicken for this recipe: Chicken must be brought to a temperature of 40 degrees F after feather removal. The industry standard immerses chicken in a cold-water bath. When chicken is cooled using this process, it will absorb some of this liquid. Once packaged, it may purge fluid into its tray, which dilutes the flavor and results in a soggy texture. Avoid buying chicken with an excess amount of liquid in its packaging.
Another process is air chilling, which circulates chicken through purified cold air to bring it to a safe temperature. Not all air chilling is the same. Some producers will use a combination of water and cold air and seek verification from the USDA that an air-chilling process was used. Labels will indicate if chickens are 100 percent air chilled. In addition, if you love grilled or pan-seared chicken with crispy, golden skin, air-chilled chicken is a better choice. Because no water is used in the chilling process, chicken skin remains taut and never soggy.
Carol Ann

Carol Ann Kates is the award-winning author of cookbook, Secret Recipes from the Corner Market, and international Amazon best-selling and award-winning author of Grocery Shopping Secrets. She’s an expert in how to shop, select, and store produce for maximizing home cooking outcomes and minimizing time and money spent. As a former supermarket and deli operator, Carol Ann shares grocery-insider wisdom—the same expertise you used to receive when patronizing a mom-and-pop establishment. Contact her at CarolAnn@CarolAnnKates.com and explore her website, www.CarolAnnKates.com.
Copyright 2025 All Rights Reserved Carol Ann Kates
1
Searing the Beef
Sear beef fillets on high heat for 2 minutes per side to form a golden crust. Let it cool before proceeding to keep the beef tender.
1
Searing the Beef
Sear beef fillets on high heat for 2 minutes per side to form a golden crust. Let it cool before proceeding to keep the beef tender.
1
Searing the Beef
Sear beef fillets on high heat for 2 minutes per side to form a golden crust. Let it cool before proceeding to keep the beef tender.
1
Searing the Beef
Sear beef fillets on high heat for 2 minutes per side to form a golden crust. Let it cool before proceeding to keep the beef tender.
Notes


1
Season the good fresh beef fillets with salt and black pepper. Heat olive oil in a pan over high heat and sear the fillets for 2 minutes per side until it fully browned. Remove the beef from the pan and brush with a thin layer of mustard. Let it cool.
1
Season the good fresh beef fillets with salt and black pepper. Heat olive oil in a pan over high heat and sear the fillets for 2 minutes per side until it fully browned. Remove the beef from the pan and brush with a thin layer of mustard. Let it cool.
1
Season the good fresh beef fillets with salt and black pepper. Heat olive oil in a pan over high heat and sear the fillets for 2 minutes per side until it fully browned. Remove the beef from the pan and brush with a thin layer of mustard. Let it cool.
1
Season the good fresh beef fillets with salt and black pepper. Heat olive oil in a pan over high heat and sear the fillets for 2 minutes per side until it fully browned. Remove the beef from the pan and brush with a thin layer of mustard. Let it cool.
Instructions
Quality Fresh 2 beef fillets ( approximately 14 ounces each )
Quality Fresh 2 beef fillets ( approximately 14 ounces each )
Quality Fresh 2 beef fillets ( approximately 14 ounces each )
Beef Wellington
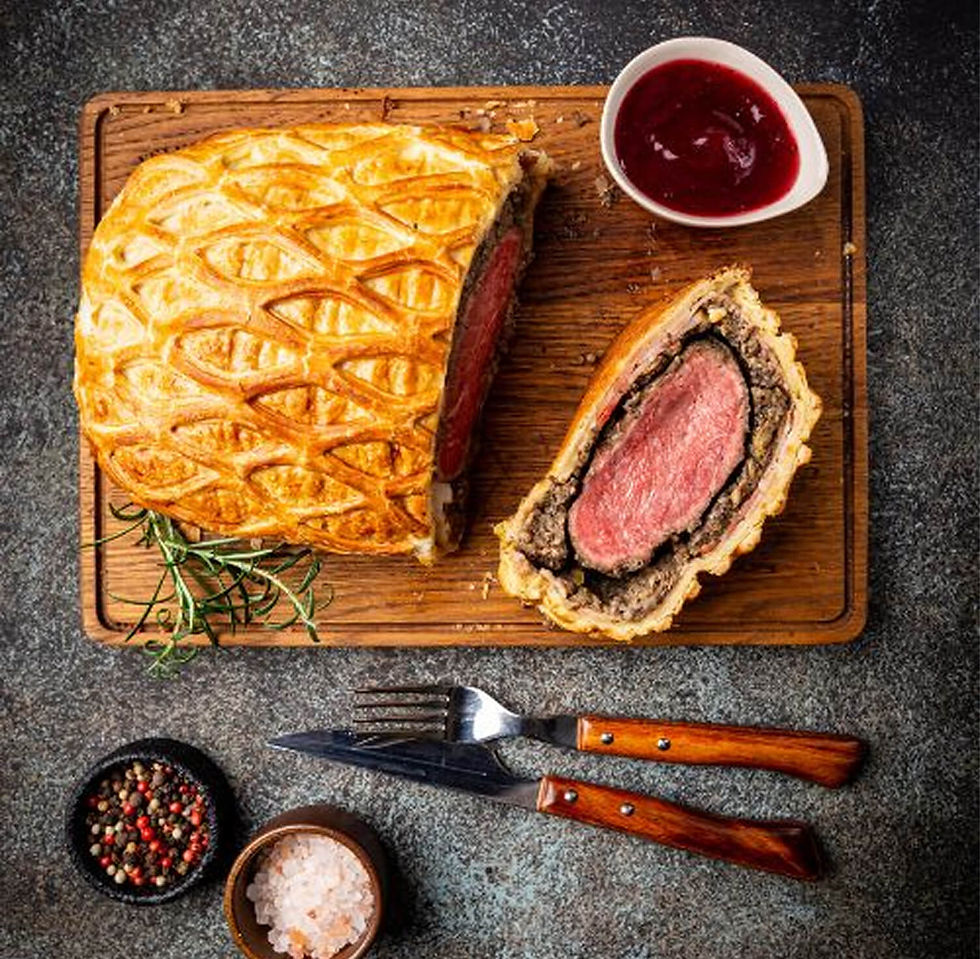
Beef Wellington
Fusion Wizard - Rooftop Eatery in Tokyo
Author Name
%20(1).jpg)
Beef Wellington is a luxurious dish featuring tender beef fillet coated with a flavorful mushroom duxelles and wrapped in a golden, flaky puff pastry. Perfect for special occasions, this recipe combines rich flavors and impressive presentation, making it the ultimate centerpiece for any celebration.
Servings :
4 Servings
Calories:
813 calories / Serve
Prep Time
30 mins
Prep Time
30 mins
Prep Time
30 mins
Prep Time
30 mins


Comments