
Marry Me Chicken or Engagement Chicken?
- Carol Ann Kates

- Feb 12
- 4 min read

Have you heard about Engagement Chicken? Legend has it that over 70 people got engaged after making this recipe for their special someone. Ina Garten has a recipe for Engagement Chicken, but people have been making a version of this recipe long before Ina shared it in her cookbook, The Barefoot Contessa Cookbook, published in 1999.
In 1982 a fashion editor with Glamour magazine shared a recipe for a whole lemon-and-herb roasted chicken with her assistant, who prepared it for her boyfriend. He proposed within a month. The recipe was passed around the Glamour office, and several other staffers became engaged. Can a recipe really be that good? Glamour published their version in 2004. Ina’s version is sometimes called “Jeffrey’s Roast Chicken”.
There is also a recipe called Marry Me Chicken. Delish claims to have developed the “Original Marry Me Chicken” that went viral on TikTok. This recipe became an Internet sensation, so much so that The New York Times covered the phenomenon and published their own version in 2023. Lindsay Funston, however, claims to have created this recipe in 2016. Ms. Funston made it for a photo shoot, and afterwards the photographer had to give it a try. After taking a bite, he said, “I’d marry you for that chicken,” and that’s how the recipe got its name. This recipe uses boneless, skinless chicken breasts instead of a whole chicken.
There has been so much buzz about Marry Me Chicken that I just had to give it a try. The original recipe uses thyme, but I added oregano and paprika and a bit more cream and Parmesan cheese. Following is my version of that sensation. Since it is quite saucy, I served it over pasta, but you can serve it as is or over rice.
Now, if you haven’t decided what to make your special someone for Valentine’s Day and are hoping for a proposal, you might want to try “Marry Me Chicken,” or make it for your sweetie just because. My husband loved it. This recipe really is that good.
Carol Ann’s Marry Me Chicken
Serves 2
Since the chicken breasts are seared, it is best to use air-chilled chicken in this recipe.
2 chicken breasts
2 tablespoons extra virgin olive oil
Salt to taste
Large grind black pepper to taste
8 ounces penne pasta
3 teaspoons minced garlic
½ cup sun-dried tomatoes, chopped
1 teaspoon dried oregano leaves
1 teaspoon paprika
½ teaspoon crushed red pepper flakes
1 cup chicken broth
1 cup heavy cream
1 cup Parmesan cheese, grated
Fresh basil leaves for garnish
Place a large skillet over a medium-high heat and add olive oil. Season chicken breasts to taste with salt and pepper. When oil is hot, add chicken and cook until golden brown, about 5 minutes per side.
Place a large kettle of water over a high heat and bring to a boil. Cook pasta according to package directions until al dente.
Remove chicken breasts and transfer to a plate. Reduce the heat to low and add garlic, sun-dried tomatoes, oregano, paprika, and crushed red pepper flakes and sauté about 1 to 2 minutes.
Add chicken broth and heavy cream and stir to combine, scraping the bottom of the skillet. Add Parmesan cheese and stir until cheese is melted and well combined. Place chicken breasts back into the skillet and cover. Cook another 5 minutes, or until chicken is cooked through and warmed.
Transfer the pasta and chicken to a serving bowl and mix to thoroughly coat pasta. Garnish with fresh basil leaves, chopped or julienned.
Select air-chilled chicken for this recipe: Chicken must be brought to a temperature of 40 degrees F after feather removal. The industry standard immerses chicken in a cold-water bath. When chicken is cooled using this process, it will absorb some of this liquid. Once packaged, it may purge fluid into its tray, which dilutes the flavor and results in a soggy texture. Avoid buying chicken with an excess amount of liquid in its packaging.
Another process is air chilling, which circulates chicken through purified cold air to bring it to a safe temperature. Not all air chilling is the same. Some producers will use a combination of water and cold air and seek verification from the USDA that an air-chilling process was used. Labels will indicate if chickens are 100 percent air chilled. In addition, if you love grilled or pan-seared chicken with crispy, golden skin, air-chilled chicken is a better choice. Because no water is used in the chilling process, chicken skin remains taut and never soggy.
Carol Ann

Carol Ann Kates is the award-winning author of cookbook, Secret Recipes from the Corner Market, and international Amazon best-selling and award-winning author of Grocery Shopping Secrets. She’s an expert in how to shop, select, and store produce for maximizing home cooking outcomes and minimizing time and money spent. As a former supermarket and deli operator, Carol Ann shares grocery-insider wisdom—the same expertise you used to receive when patronizing a mom-and-pop establishment. Contact her at CarolAnn@CarolAnnKates.com and explore her website, www.CarolAnnKates.com.
Copyright 2026 All Rights Reserved Carol Ann Kates
1
Searing the Beef
Sear beef fillets on high heat for 2 minutes per side to form a golden crust. Let it cool before proceeding to keep the beef tender.
1
Searing the Beef
Sear beef fillets on high heat for 2 minutes per side to form a golden crust. Let it cool before proceeding to keep the beef tender.
1
Searing the Beef
Sear beef fillets on high heat for 2 minutes per side to form a golden crust. Let it cool before proceeding to keep the beef tender.
1
Searing the Beef
Sear beef fillets on high heat for 2 minutes per side to form a golden crust. Let it cool before proceeding to keep the beef tender.
Notes


1
Season the good fresh beef fillets with salt and black pepper. Heat olive oil in a pan over high heat and sear the fillets for 2 minutes per side until it fully browned. Remove the beef from the pan and brush with a thin layer of mustard. Let it cool.
1
Season the good fresh beef fillets with salt and black pepper. Heat olive oil in a pan over high heat and sear the fillets for 2 minutes per side until it fully browned. Remove the beef from the pan and brush with a thin layer of mustard. Let it cool.
1
Season the good fresh beef fillets with salt and black pepper. Heat olive oil in a pan over high heat and sear the fillets for 2 minutes per side until it fully browned. Remove the beef from the pan and brush with a thin layer of mustard. Let it cool.
1
Season the good fresh beef fillets with salt and black pepper. Heat olive oil in a pan over high heat and sear the fillets for 2 minutes per side until it fully browned. Remove the beef from the pan and brush with a thin layer of mustard. Let it cool.
Instructions
Quality Fresh 2 beef fillets ( approximately 14 ounces each )
Quality Fresh 2 beef fillets ( approximately 14 ounces each )
Quality Fresh 2 beef fillets ( approximately 14 ounces each )
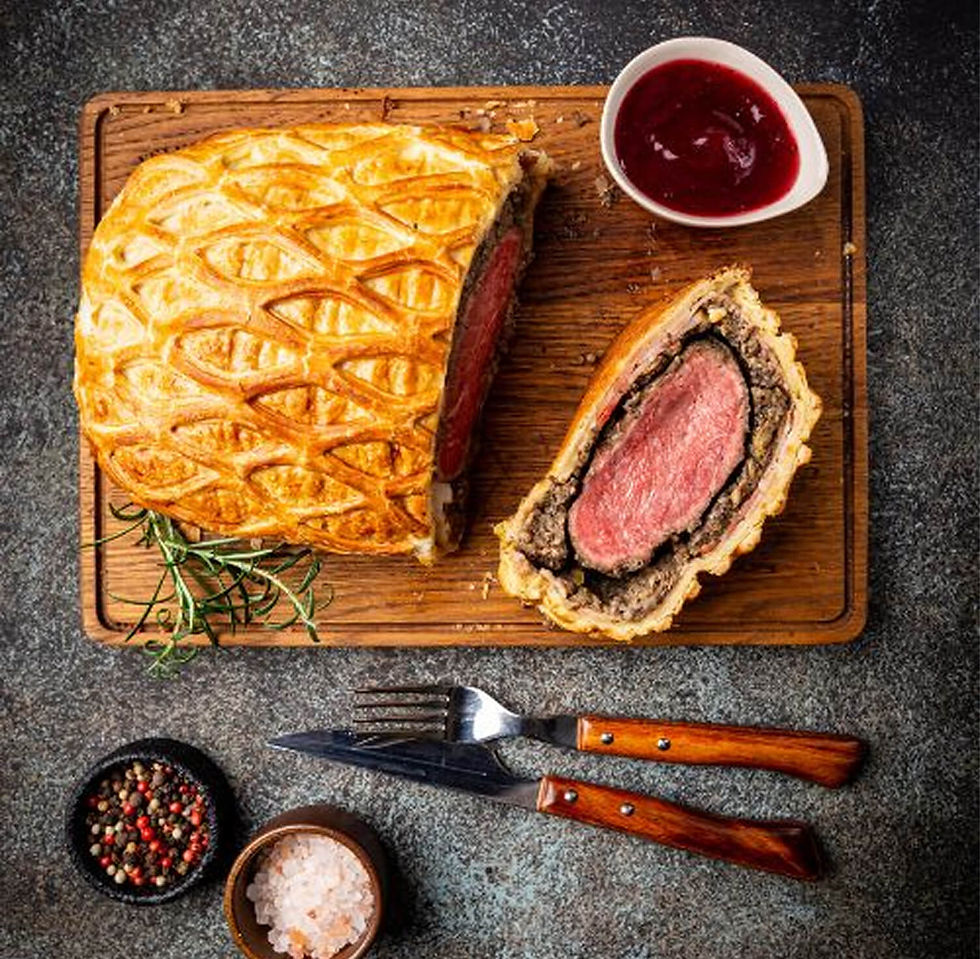
Beef Wellington
Beef Wellington
Fusion Wizard - Rooftop Eatery in Tokyo
Author Name
%20(1).jpg)
Beef Wellington is a luxurious dish featuring tender beef fillet coated with a flavorful mushroom duxelles and wrapped in a golden, flaky puff pastry. Perfect for special occasions, this recipe combines rich flavors and impressive presentation, making it the ultimate centerpiece for any celebration.
Servings :
4 Servings
Calories:
813 calories / Serve
Prep Time
30 mins
Prep Time
30 mins
Prep Time
30 mins
Prep Time
30 mins


Comments